TECHRENA

Welcome to the Technical Arena providing the latest updates and solutions!!

  • Entries
  • Comments

  • HOME
  • |
  • How To
  • |
  • Solutions
  • |
  • Windows 7
  • |
  • Techrena dot Net

Send Email Attachments Using Gmail Even When You Are Offline

Labels: Gmail, TechNews

(Cross Posted via Techrena- Permalink (Send Email Attachments In Gmail While Offline))

Gmail team has announced the new feature that lets you attach files while sending mails even when you are offline (via Offline Gmail).

“Starting today, attachments work just the way you would expect them to whether you are online or offline.Just add the attachment and send your message.”

To Activate This Feature:

  • Enable ‘Offline Gmail’ under ‘Labs’ section first (Click ‘Enable’ and save settings)
  • Now you can see the ‘Offline’ link next to the green Labs features button just right next to your username inside your right upper corner of Gmail.

Offline Button in Gmail

  • Click the above Offline link and install the Gears

Install Offline Gmail Access Gears

Installing Gears for Gmail Offline

  • Install Gears and restatrt your browser, you are done.Go through your mails offline and send attachments offline and even more of them.

P.S: You cannot however use ‘Adding Inline Images’ in Gmail Offline, except that you can virtually play around with your offline Gmail messages.

Posted by techrena on Friday, November 27, 2009
1 comments

BSNL Prepaid Broadband Launched In AP

Note: Cross posted from TECHRENA dot Net.

Permalink

BSNL has today officially launched the much talked Prepaid Broadband for the customers in Andhra Pradesh (At present the service is not yet available in Hyderabad Telecom District though).

The advertisement in newspapers today reads:

“Now you have the power to control the broadband bill.Pre-decide your usage, speed and validity by a recharge voucher of your choice ranging from Rs.50/- to Rs.5000 /- for the limited usage plans and Rs.300/- to rs.1200 /- for the unlimited usage plans.

Top up vouchers: Rs.100/- to Rs.500/-

Validity Vouchers: Rs.100/- to Rs.250/-

Initial Charges    : Rs. 1000/-  for Type-I modem and Rs.1600/- for Type-II modem.

Customer service numbers for further queries:

1800-424-1600 (Toll Free)

1500 (Toll Free from any BSNL phone).

Ad (I could get only Telugu version):

bsnl ap prepaid broadband

Registration and Installation is free for 30 days from today, so hurry up.

would like to hear your opinions about this new service.Note: Cross posted from TECHRENA dot Net.

Permalink

Posted by techrena on Wednesday, November 25, 2009
0 comments

Install GreaseMonkey User Scripts in Google Chrome

Labels: Chrome, Google, Greasemonkey

Though the older versions of Google Chrome did not support User scripts, but the new version of Google Chrome 2.0 has the capability of using Greasemonkey User Scripts. GreaseMonkey can be installed and enabled in the latest Versions of Google Chrome.Install GreaseMonkey User Scripts in Google Chrome

In order to install Greasemonkey User Scripts in your Google Chrome, first you need to update your Google Chrome Version to 2.0 or higher if you are still using the older version.

The Full detail and step by step procedure is given here:

Enable GreaseMonkey User Scripts in Google Chrome

Posted by Dennis on Saturday, April 11, 2009
2 comments

How to Transfer Contacts from One Gmail to Another Gmail Account

Labels: Google, How To, Solutions

Mr Karanam, one of our privileged reader had asked a query in Ask Techrena section of our blog. His question was:


Dear Techrena,
I want to transfer my current gmail contacts to another gmail account. I don’t know how to do this. It is difficult to transfer all the contacts manually. If there is any method to transfer the contacts please help me with it.

Thanking you in Advance.

Karanam Sreekanth

We have found the solution and have posted in our blog.

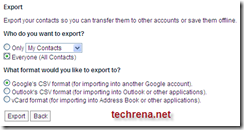
Exporting Gmail contacts to another Gmail account

It is an easy process. Gmail has made it very easy for users to transfer or export contacts from one Gmail account to another Gmail account. You have to just save the contacts as CSV format or vCard format and import the contacts using the other account.

The complete solution is given in the post below:

Exporting Gmail contacts to another Gmail account

We really appreciate our readers supporting us and posting queries. Please do support techrena and Help us providing you valuable solutions.

Posted by Dennis on Saturday, April 04, 2009
2 comments

How to Hide Inactive Icons in Windows Taskbar

Labels: How To, Solutions, Windows

Mr Ashok, one of our esteemed reader had posted a query in Ask Techrena section of our blog. His query was:


sir,
there is a problem in my laptop. is it does not hide the inactive icon. i can use the control panel and go to task bar option and apply the hide inactive icon but window does not hide the icon's. my laptop configuration is:
2GB ram
160 hard disk
processor core 2 duo
window XP

We have found the solution and posted in our blog.

Auto Hide Inactive Icons

The inactive icon tray may not show up sometimes in spite of enabling hiding from the taskbar properties. If such a problem occurs then we have to enable it from he windows registry. A registry named EnableAutoTray is to be created and set the value.

The complete solution has been described in the post below:

Enable Hide Inactive Icons Tray Using Registry in Windows

The solution works for Windows XP, Vista and Windows 7.

We sincerely thank Mr Ashok for asking for solutions and request all our blog readers to support techrena and not to hesitate to post their queries.

Posted by Dennis on Saturday, April 04, 2009
1 comments

Solve Turn off Button Missing in Welcome Screen in Windows XP, Vista and 7

Labels: How To, Solutions, Windows

A common problem for most of the Windows XP home edition users is that Turn off Button is missing from their welcome screen or their log on page. Most of us do not notice this problem as we do not care about it. But speaking the truth Turn off button is really necessary in the log on screen as we should be able to shut down the computer without knowing the password. Otherwise you will not be able to shutdown the computer safely without knowing the password. This problem of missing shutdown button from the welcome screen or the log on page may be a result of some registry change by some of the software you install. But this problem has a very simple solution. You just need to change a registry value.

Click here to see Missing turn off button from Wecome screen image

In Windows XP Home Edition or Vista Basic unlike the professional or ultimate editions which doesn’t support gpedit.msc or secpol.msc this problem can be solved by using only the registry.

I am presenting two methods here. Both the methods need your registry registry to be enabled. While performing the steps if you get an error message like Registry Editor has been disabled by your Administrator" then you have to enable the regedit command. To enable registry editor Click here.

Method 1: By using Command Prompt

Step 1: Open a command prompt (Press Start+R, Type cmd and Enter)

Step 2: Copy the command below and paste it in the command prompt. Note that for pasting in command prompt right click in the black screen and select paste.


REG ADD HKLM\Software\Microsoft\Windows\CurrentVersion\Policies\System /v ShutdownWithoutLogon /t REG_DWORD /d 1 /f

Click here to see Enable Turn off button in Welcome Screen using Command Prompt  image

Step 3: After executing the command Press Start+L and see if you can see the Turn off button. If yes ok, else restart.

Method 2: By using Registry Editor

Step 1: Open a command prompt (Press Start+R, Type regedit and Enter)

Step 2: In the Left side of the Registry Editor Navigate to the key given below:

HKEY_LOCAL_MACHINE\SOFTWARE\Microsoft\Windows\CurrentVersion\Policies\System

It is shown in the image below:

Click here to see Registry Editor path Shutdown without logon Image

Step 3: In the right side find the key ShutdownWithoutLogon. Double click on it and change the value to 1.

 http://img102.imageshack.us/img102/6976/shutdownwithoutlogon2.png

http://img214.imageshack.us/img214/3571/shutdownwithoutlogon1.png

http://img440.imageshack.us/img440/263/shutdownwithoutlogon.png

Note: If you are not able to find the key then you have to create it. Right click on the right side and select new DWORD 32 bit. Keep the Name as ShutdownWithoutLogon and set the value as 1.

Step 4: Now press Start+L and see if you can see the start button. If not Restart.

Click here to see Turn off button in Welcome Screen Image

Important:

1. If your turn off button goes missing again after some time then some process is changing the value. You need to repeat the steps again.

2. If you cannot find the root key System under Policies then create a key with the same name in the left side pane of the registry editor and continue.

Posted by Dennis on Monday, March 23, 2009
1 comments

Ophcrack USB Booting Windows Password Recovery for Windows XP or Vista

Labels: How To, Password, Solutions, USB BOOT, Windows

We have already seen using Ophcrack Live CD for Cracking Windows XP and Windows Vista Passwords. The thing is that now a days we do not use CDs anymore, we use USB drives for our day to day activities. Now what if you want to run Ophcrack from your USB drive instead of wasting money on a CD or if your CD ROM Drive is not working? Moreover using USB drives are more convenient and common these days. Here I have an Ideal solution for this question. But if you are not interested in recovering the password or you simply want to reset or delete the password then there is much easier technique which requires only a 3 MB file instead of Ophcrack. Just see how to Reset windows Password Using a USB drive or a CD

In this method we will be using a program called 7-ZIP for extracting the ISO file and some batch files for making the drives bootable.

USB Requirement:

  • Minimum 512 MB for Windows XP
  • Minimum 1 GB for Windows Vista Or Windows 7 Beta
  • Format: FAT32

I have tried this method in Windows XP, Windows Vista, and Windows 7 Beta and it works perfectly fine. Follow the steps below:

Step 1: Download the ISO File For Ophcrack Live CD 2.1.0 From the links below: (Choose according to your operating system). If you have already downloaded skip this step.

Windows XP:

Size: 452 MB

http://downloads.sourceforge.net/ophcrack/ophcrack-xp-livecd-2.1.0.iso

Windows Vista or 7:

Size: 532 MB

http://downloads.sourceforge.net/ophcrack/ophcrack-vista-livecd-2.1.0.iso

Step 2: Download the ZIP File For making USB boot version of Ophcrack Live CD From the link below:

Size: 414 KB

http://www.techrena.net/downloads/usbboot.zip

Step 3
: Extract the usbboot.zip file at any location of your computer, not in the USB drive.

Step 4: Copy the Ophcrack Live CD ISO file to the usbboot folder. Double Click the USBOphcrack.bat (ExtractophIso.bat) file.

Click here to View Ophcrack Usb boot image

Step 5: Type the letter of your USB drive and press Enter (The USB Drive should be Formatted with FAT32 File system before starting the process). Here in my case the Drive letter is ‘h’.

Click here to View Select Drive Image

Step 6: Wait for the Extraction process to complete. Follow the on Screen Instructions given by the command prompt as shown below.

Click Here to view Extraction Progress image

Click here to view makeusbboot.jpg

Click here to view usbbooting.jpg

Step 7: Now restart the System. You need to set the boot order to Boot from USB Drive as the first option if you have not set USB Drive as the first option. To do this you need to go to bios setup and change the order. For most of the systems the keys like DELETE, F10, F2, F12 etc are used for going to the Bios setup. But here I have used the Boot Menu Key which will show the available boot options during start up. For my System(HP) the boot menu key is Esc. For Compaq Systems it is usually F9. So if you know the Boot menu key then no need to change the order. Just Select USB Drive from the menu.

Click here to view bootmenu.png

Step 8: Now after the boot from USB Drive you can follow the Steps 4 to Step 7 given in the previous post:

Windows Password Recovery Crack Windows XP or Vista Password Using Ophcrack

Important:

1. If you are not interested in recovering the password or you simply want to reset the password then there is much easier technique which requires only a 3 MB file instead of Ophcrack. Just visit the link to see how it works:http://www.techrena.net/computers/reset-windows-xp-vista-7-password-usb-pen-drive-cd/

2. The windows vista live CD works for Windows 7 Beta Build 7000 also. There is no official release for Windows 7 yet.

3. This is for information purposes only. We are not responsible for any damages or illegal acts resulting from this information.

4. The information provided here should be used for legal purposes only.

5. Ophcrack is a legal open source program. Visit http://ophcrack.sourceforge.net/ for more details. Click Here to Read the Terms of Use.

6. The method given here may work for previous versions of Ophcrack Live CD also. Paste the ISO file in the OphcrackUSBboot folder and continue the process.

7. If your motherboard or your BIOS does not support USB diskette Booting then this method will not work.

Posted by Dennis on Friday, March 20, 2009
40 comments

Windows Password Recovery|Crack Windows XP or Vista Password Using Ophcrack

Labels: How To, Password, Windows

What will you do if you forget your Windows XP or Vista Password? The very first thing you should try is to go to safe mode and check whether you have set your administrator password. But if the administrator password is also set then you may be thinking the only way is to format the computer and install fresh Windows XP or Vista. Well, here I am going to suggest a method here that will simply recover your lost passwords, both administrator and user in few seconds or at most some minutes without installing any software or without breaking your head. But if you are not interested in recovering the password or you simply want to reset or delete the password then there is much easier technique which requires only a 3 MB file instead of Ophcrack. Just see how to Reset windows Password Using a USB drive or a CD

Here, We will be using a software called Ophcrack which is an open source (GPL licensed) program that cracks Windows passwords by using LM hashes through rainbow tables. But you may be thinking whether it is a legal one. Yes it is completely legal according to Wikipedia. But you should not use this software for illegal purposes like unauthorized access to other’s system. I have tried this method in Windows XP, Windows Vista, and Windows 7 Beta and it works perfectly fine for an alphanumeric password length up to 14.

The method is a very simple one. You just need to download the software which is 452MB for XP and 532MB for Vista or Windows 7. Ophcrack comes in bootable Live CD 2.1.0 ISO and installation files. Here we will be using the Live CD method where no installation is required. Follow the steps below:

Step 1: Download the ISO File For Ophcrack Live CD 2.1.0 From the links below: (Choose according to your operating system)

Windows XP:

Size: 452 MB

http://downloads.sourceforge.net/ophcrack/ophcrack-xp-livecd-2.1.0.iso

Windows Vista or 7:

Size: 532 MB

http://downloads.sourceforge.net/ophcrack/ophcrack-vista-livecd-2.1.0.iso

Step 2: After the download is completed successfully burn the ISO file to a CD using a burning software. ISO files can be directly burnt (Just open with burners like Nero etc.). You should not use data mode or any other mode to burn. The CD is a bootable one. But if you do not want to use a CD, you can very well use a USB Flash Drive to run the program. Click here To see the USB Boot Technique.

Step 3: Insert the CD to your CD/DVD drive. Restart the System. You need to set the boot order to Boot from CD as the first option if you have not set CD drive as the first option. To do this you need to go to bios setup and change the order. For most of the systems the keys like DELETE, F10, F2, F12 etc are used for going to the Bios setup. But here I have used the Boot Menu Key which will show the available boot options during start up. For my System(HP) the boot menu key is Esc. For Compaq Systems it is usually F9. So if you know the Boot menu key then no need to change the order. Just Select CD/DVD ROM from the menu.

Click here to view the Boot Menu Image

Step 4: After booting from the Live CD, wait for it to load and select Ophcrack VESA mode(Recommended). If you have a graphics card you can try Graphics Mode.

Click here to View Ophcrack Menu Image

Step 5: If you have more than one partition containing the password hashes it will ask you to select one. But most of the computers will have only one hash partition, so you may not see this step. Select any partition and try if it asks you as shown below.

Click here to View Select hash Partition Image

Step 6: Wait for Ophcrack to run and find your password. After getting the password you need,you can simply click exit even if the progress is not 100%. No need to wait till end.

Click here to View Ophcrack Progress Image

Here I had set the password as techrena. It took around 1 min 20 sec to find this password.

Step 7: After the process it will ask you to press any key to exit Ophcrack. Then Type ‘y’ to shutdown the System.

Click here to View Ophcrack Shutdown Image

Now start your system. Enter the password you have found. And that’s it, see how simple it is!

Important:

1. You can use any USB Drive instead of the CD to run Ophcrack. To see this technique Visit: http://techrena.blogspot.com/2009/03/ophcrack-usb-booting-windows-password.html

2. If you are not interested in recovering the password or you simply want to reset the password then there is much easier technique which requires only a 3 MB file instead of Ophcrack. Just visit the link to see how it works:http://www.techrena.net/computers/reset-windows-xp-vista-7-password-usb-pen-drive-cd/

3. The windows vista live CD works for Windows 7 Beta Build 7000 also. There is no official release for Windows 7 yet.

4. This is for information purposes only. We are not responsible for any damages or illegal acts resulting from this information.

5. The information provided here should be used for legal purposes only.

6. Ophcrack is a legal open source program. Visit http://ophcrack.sourceforge.net/ for more details. Click Here to Read the Terms of Use.

Posted by Dennis on Thursday, March 19, 2009
58 comments

New Apple iPod Shuffle: Video, Features, Specification and Price

Labels: apple, iPod, TechNews


Apple introduced the all-new iPod shuffle, the world’s smallest music player at nearly half of the size of the previous model, and the first music player that talks to you. The revolutionary new VoiceOver feature enables iPod shuffle to speak your song titles, artists and playlist names. The third generation iPod shuffle is significantly smaller than a AA battery, holds up to 1,000 songs and is easier to use with all of the controls conveniently located on the earphone cord. With the press of a button, you can play, pause, adjust volume, switch playlists and hear the name of the song and artist. iPod shuffle features a gorgeous new aluminum design with a built-in stainless steel clip that makes it ultra-wearable.


New iPod Shuffle

iPod shuffle is based on Apple’s incredibly popular shuffle feature, which randomly selects songs from your music library. And now, when you can’t remember the name of a song or an artist playing, with the press of a button iPod shuffle tells you the name of the song and artist. iPod shuffle can even tell you status information, such as battery life. With the ability to hold up to 1,000 songs and the VoiceOver feature, you can now easily switch between multiple playlists on your iPod shuffle. iPod shuffle can speak 14 languages including English, Czech, Dutch, French, German, Greek, Italian, Japanese, Mandarin Chinese, Polish, Portuguese, Spanish, Swedish and Turkish.

The new iPod shuffle comes in silver or black and features a sleek and ultra-wearable design with a built-in stainless steel clip. iPod shuffle is the smallest music player in the world and is incredibly easy to clip to almost anything and take with you everywhere you go. iPod shuffle features up to 10 hours of battery life.

 iPod Black and Silver


Specifications And Price:

Size and weight

Height:
1.8 inches (45.2 mm)
Width:
0.7 inch (17.5 mm)
Depth:
0.3 inch (7.8 mm) including clip
True volume:
0.26 cu inches (4,326 cu mm)
Weight:
0.38 ounce (10.7 grams)

Capacity

4GB flash drive
Holds up to 1,000 songs in 128-Kbps AAC format3
Stores data via USB flash drive

Battery and power

Built-in rechargeable lithium polymer battery
Playback time: Up to 10 hours when fully charged
Charging via USB to computer system or power adapter (sold separately)
80% charged in 2 hrs; fully charged in 3 hrs.

Headphones

Apple Earphones with Remote
Frequency response: 20Hz to 20,000Hz
Impedance: 32 ohms

Environmental requirements

Operating temperature: 32° to 95° F (0° to 35° C)
Nonoperating temperature: -4° to 113° F
(-20° to 45° C)
Relative humidity: 5% to 95% noncondensing
Maximum operating altitude: 10,000 feet (3000 m)

Pricing & Availability Suggested price of $79 (US) through the Apple Store


See how the new iPod controls works Watch Video:

Posted by Dennis on Friday, March 13, 2009
2 comments

Hide disk drives or partitions in Windows

Labels: How To, Solutions, System

A Tutorial on how to hide drives in my computer for windows systems

Hiding a folder or a file is a normal day to day process. But what do we do if you want to hide a drive or a partition. Sometimes we may want to hide a disk drive or a partition for our privacy. This question has been a problem with me till now. I have found out that it is a very easy process which needs to create a simple registry. We should note that the method i am going to give here does not delete any of your disk drives, data, and we can find the drives in the disk management. We can access the hidden drives from the address bar e.g. type D: in the address bar and enter to explorer D drive etc.

Drive: Value Drive: Value Drive: Value
A 1 B 2 C 8
D 16 E 32 F 64
G 128 H 256 I 512
J 1024 K 2048 Continue -------

Show All Drives: Value = 0

How It works:

A drive is assigned a value according to the drive letter. For example value for “A” drive is 2^0 (Two to the power zero) i.e. 1, “B” Drive is 2^1 i.e. 2 and it goes on.  Now if you want to hide D drive and E drive we have to give the value as (8+16) i.e. 24 in the command i have given below. Windows recognizes the values and hides your D and E drive. If you want to show all the drives give the value 0. Its simple.

Here I have given the simplest solution. Just follow the simple steps below:

Step 1: Press Start + R and type cmd. Click OK. It opens a command prompt.

Opening Command Prompt

Step 2: Copy the COMMAND code given in the table below:

REG ADD HKCU\Software\Microsoft\Windows\CurrentVersion\Policies\Explorer /v NoDrives /t REG_DWORD /d 24 /f


Step 3: Paste the code in the command prompt. In order to paste it, right click on the command prompt and select paste. Change the value according to the drives you want to hide and press enter. [Here the value i have given is “24” for hiding D and E drives(8+16), refer the table above for your values]

Paste in command Prompt

Step 4: The code will be executed as shown. Now Log Off your system and Log On (or simply restart).

Hide Disk Drives in windows

Note: 1. The value 24 is highlighted because this is the value you need to change according to your drives you need to hide.

Note: 2. If you get any error messages like “Registry editor has been disabled by your administrator” then you need to enable your registry editor. To enable your registry editor Visit the link given below:

http://techrena.blogspot.com/2008/11/how-to-enable-registry-editor-regedit.html

After restarting or logging on you will find that the selected drives are not present. In order to show all your hidden drives give the value as 0. If you find any problem ask us here.

Posted by Dennis on Thursday, March 12, 2009
1 comments

“Check stopped - earnings credited back” seen in your Adsense Payment History?

Labels: Adsense, TechNews

Some Adsense publishers who were expecting their February 2009 Adsense Earnings check from Google may have observed this message “Check stopped - earnings credited back” message in their Payments History tab[Even though there were no visible holds on the account].I was searching for an official word from Google about this and finally I could get one.

AdSensePro William,a Google Employee from Google Hyderabad has addressed this issue in one of the posts in Adsense Help Forum

This is due to a bug in Adsense payment hold system.

He says

“If you were one of the publishers who ended up with your AdSense account on hold for payments due to an AdSense bug, you were reassured that payments would be processed to be included at the end of February. Originally, the payments were to  be included in the payments at the end of February. However, because Google had to remove these holds manually, it seems as though this wasn’t done until after the February 15th cut off time. So what does this mean for affected publishers?  You have to wait another month to receive your payment due to Google’s bug, according to AdSensePro Jen.”

So affected publishers can expect their earnings to be included in next payment cycle[If you get this message “Check stopped - earnings credited back” before March 15th in your account or if you get it after March 15, you can expect your earnings to be included in next month’s payment cycle].

Posted by Techie Blogger on Thursday, March 12, 2009
0 comments

Solve Windows cannot find explorer.exe startup problem

“Windows cannot find explorer.exe”. You may be familiar with this problem showing error messages on start up. This problem is quite similar to the problem like Windows cannot find regsvr.exe. Normally explorer.exe is a windows file which is to be executed during startup. This is an essential process without which we cannot explore any windows system. But after a virus attack, the virus may change some registry values to run an image of explorer.exe which may be a virus. After the removal of the virus by your anti virus, windows cannot find the image process during startup and shows the error message as shown below.


Here I have given the simplest solution which even a naive can do it. Just follow the simple steps below:

Step 1: Press Start + R and type cmd. Click OK. It opens a command prompt.

[Windows7d.png]

Step 2: Copy the code given in the table below:

reg delete "HKEY_LOCAL_MACHINE\SOFTWARE\Microsoft\Windows NT\CurrentVersion\Image File Execution Options" /v explorer.exe /f

reg delete "HKEY_LOCAL_MACHINE\SOFTWARE\Microsoft\Windows NT\CurrentVersion\Image File Execution Options" /v iexplorer.exe /f


Step 3: Paste the code in the command prompt. In order to paste it, right click on the command prompt and select paste.

Windows cannot find explorer.exe

Step 4: The code will be executed as shown. Now restart the system.

Windows cannot find explorer.exe

After restarting you will find that there is no error message. If you find any problem ask us here.

N.B.:

1. If you find any error like: “The system was unable to find the specific key value or key”, just ignore it. It is because the iexplore.exe key may not be present.

2. If you find any error like: “Registry Editor has been disabled by your administrator” then the virus has blocked your regedit function. You can enable it in easy steps given in the link below:

http://techrena.blogspot.com/2008/11/how-to-enable-registry-editor-regedit.html

3. If you want to execute the two keys seperately, you can execute them by copying them and pasting it in the cmd individually. An example is given below:

Windows cannot find explorer.exe

Posted by Dennis on Saturday, March 07, 2009
2 comments

Remove Windows cannot find regsvr.exe message at startup


If your system was infected by the regsvr.exe or commonly known as newfolder.exe virus and if you have successfully removed the virus from your system, but still you may be getting this annoying error message during startup telling “Windows cannot find regsvr.exe” as shown below. You may face similar problems like “Windows cannot find explorer.exe” etc.  This is because the virus had assigned a registry value to execute itself during the startup. As you have removed the virus, the system can no longer find this virus file and hence the error message.


Removing regsvr.exe startup

This problem has a very easy solution. Just follow the steps below:

Step 1: Press Start+R and type regedit. It will open registry editor. But if you get an error like Registry editor has been disabled by the administrator then you need to enable the registry editor. To enable registry editor click: How to enable Registry Editor (REGEDIT).

Removing regsvr.exe startup

Step 2: Now after opening the registry editor, follow the registry path as follows:

HKEY_LOCAL_MACHINE\SOFTWARE\Microsoft\WindowsNT\CurrentVersion\Winlogon

This path is also shown in the images below:

Removing regsvr.exe startup

Removing regsvr.exe startup

Removing regsvr.exe startup

Removing regsvr.exe startup

Step 3: After opening Winlogon look for Shell in the right pane of the registry editor as shown.

Removing regsvr.exe startup

Step 4: Double Click the Shell registry value. You can find “Explorer.exe regsvr.exe” in the Value data field.

Removing regsvr.exe startup

Step 5: Delete regsvr.exe alone and click OK.

Removing regsvr.exe startup

Step 6: Now the registry has been changed. Closed all programs and restart.

Removing regsvr.exe startup 

After restart you can find that the message is no longer shown.

N.B.: Make sure that you don’t delete Explorer.exe from the Shell registry.


Posted by Dennis on Saturday, March 07, 2009
59 comments

Google’s interesting first tweet from Twitter :a stream of 0s and 1s

Labels: TechNews

Google Joins Twitter—But What does Google’s First Tweet mean?

Twitter,the star of micro blogging revolution  has been getting huge response from all over the globe and has been attracting the real big companies around the world.The latest addition to Twitter is the Search engine giant Google.[Other Google services like Blogger and Youtube already have Twitter accounts]

On Feb 26,2009 Google marked it’s official entry into twitter[link] with an interesting first tweet which contains a stream of 0’s and 1’s following ‘I’m’.Reads as:

I'm 01100110 01100101 01100101 01101100 01101001 01101110 01100111 00100000 01101100 01110101 01100011 01101011 01111001 00001010


Google's first tweet with a stream of 0's and 1's Techrena

Although you can guess the full sentence from the starting word I’m but it’s still tricky.It just took some minutes for tech geeks to decode the binary code.[Refer ASCII Coding Wiki]

Decoded Google’s First Tweet:


It decodes to nothing but what we have guessed

“I’m F E E L I N G   L U C K Y”

Interesting,isn’t it?[After all Google always tries to be different!].

And Yahoo is even quicker to welcomes it’s rival with a welcome tweet:

Yahoo welcomes Google With a tweet Techrena

The second tweet of the Google is about the new Google Apps Status Dashboard where you can check the status of various Google Applications.

Happy Tweeting,Google!!!

Posted by Techie Blogger on Sunday, March 01, 2009
1 comments

Blogroll in Blogger:Pass your blog’s PageRank to your favorite blogs

Labels: Blogger Tips

Blogger Blogroll:Why should you use it?


Last year Blogger has first unveiled this new feature in ‘Blogger in Draft’[later made available to all blogger.com blogs] called ‘Blog List’ which is similar to ‘Blogroll’ feature in Wordpress blogs.It may contain a list of your favorite blogs or the ones from your Google Reader’s subscriptions.


“A Blog List is much more than just a list of links: it's a live view of the blogs that matter to you. By default, your Blog List will show the most recently updated blogs first.”

Adding Blogger Blogroll to your blog:

It’s pretty much simple as you can see it is the first option available in your blog's Gadgets section[Go to Layout>>Page Elements>>Click Add a Gadget].

Blogroll Blogger Techrena

Then you can add your own blogs list or you can import your favorite blogs from your Google Reader’s subscriptions.

Adding a Blogger Blogroll to your blog Techrena

Advantages of Adding Blogroll:

It’s extremely helpful if you own more than one blog with one blog with Good PageRank and other with low PageRank.Unlike other JavaScript based Blogrolls,Blogger Blogroll is a HTML based gadget so all your links will get your blog’s Page Rank being passed to them.

Posted by Techie Blogger on Sunday, March 01, 2009
1 comments

Install Windows XP from USB Disk Drive

Labels: How To, Solutions, USB BOOT, Windows

The post has been moved to the location http://www.techrena.net/computers/install-windows-xp-usb-disk-drive-pen-drive/ by the author. We regret for the inconvenience.

Go to Home Page: http://techrena.blogspot.com/

Posted by Dennis on Tuesday, February 24, 2009
1 comments

Adsense now allows publishers to change fonts in Ad units

Labels: Adsense

Now you can change font in your Adsense Ad Units

It ain’t great,but it ain’t bad either.Adsense now allows you to select the font of the text in ad units.This is a feature that many Adsense publishers have been asking [Remind you,premium Adsense publishers can change their font and even font size of the text in their ads].This feature has been rolled out today morning while an announcement has been made in the Google Adsense Official Blog.

Change fonts in your Adsense Ads

This isn’t great because choice of font has been limited to:Arial, Times, and Verdana font faces[The default being 'Standard AdSense font family'].This isn’t bad because something is better than nothing.

You can configure font settings to all of your ads or to selected ads.To change your existing ads font settings go to Manage Ads under Adsense Setup tab and then edit the Adsense unit using the font choices.You can also select the font face if you are creating a new Adsense ad unit.

Learn More in this Adsense official Blog Post

Posted by Techie Blogger on Friday, February 20, 2009
1 comments
Newer Posts Older Posts Home
Subscribe to: Posts (Atom)


  • Techrena Dot Net

Loading...

Enter your email address:

Delivered by FeedBurner

  • Blog Archive

    • ►  2010 (14)
      • ►  October (1)
      • ►  August (1)
      • ►  July (1)
      • ►  April (1)
      • ►  March (2)
      • ►  February (3)
      • ►  January (5)
    • ▼  2009 (35)
      • ▼  November (2)
        • Send Email Attachments Using Gmail Even When You A...
        • BSNL Prepaid Broadband Launched In AP
      • ►  April (3)
        • Install GreaseMonkey User Scripts in Google Chrome
        • How to Transfer Contacts from One Gmail to Another...
        • How to Hide Inactive Icons in Windows Taskbar
      • ►  March (10)
        • Solve Turn off Button Missing in Welcome Screen in...
        • Ophcrack USB Booting Windows Password Recovery for...
        • Windows Password Recovery|Crack Windows XP or Vist...
        • New Apple iPod Shuffle: Video, Features, Specifica...
        • Hide disk drives or partitions in Windows
        • “Check stopped - earnings credited back” seen in y...
        • Solve Windows cannot find explorer.exe startup pro...
        • Remove Windows cannot find regsvr.exe message at s...
        • Google’s interesting first tweet from Twitter :a s...
        • Blogroll in Blogger:Pass your blog’s PageRank to y...
      • ►  February (12)
        • Install Windows XP from USB Disk Drive
        • Adsense now allows publishers to change fonts in A...
      • ►  January (8)
    • ►  2008 (20)
      • ►  December (4)
      • ►  November (12)
      • ►  October (4)

    Labels

    • Acer Aspire (1)
    • Adsense (2)
    • apple (1)
    • Bing (1)
    • Blogger Tips (1)
    • Browers (2)
    • Canon (1)
    • Chrome (1)
    • Deep Linking (1)
    • Digital Cameras (1)
    • Downloads (3)
    • Drivers (1)
    • Firefox (1)
    • Gmail (1)
    • GodMode (1)
    • Google (7)
    • Greasemonkey (1)
    • How To (29)
    • HP Laptops (3)
    • Internet (1)
    • iPod (1)
    • Mobile Phones (4)
    • Network (2)
    • Nokia (4)
    • Notebooks (4)
    • oscars 2010 live (1)
    • Password (2)
    • PDA (1)
    • Router (2)
    • Solutions (15)
    • Sony Ericsson (1)
    • System (3)
    • TechNews (6)
    • USB BOOT (3)
    • Virtual XP (1)
    • Virus (1)
    • VistaSolutions (3)
    • watch online (1)
    • Websites (1)
    • Windows (8)
    • Windows7 (9)
    • Yahoo (1)
    • YouTube (2)

Copyright 2009 Techrena dot Net